Create and upload your own panoramas
You can now add your own panoramas to Panorama Slides by uploading your JPEG files. Panoramas must be 360º so that the left side of your panoramas matches with the right side and viewers can enjoy a fully immersive experience of looking all around.
You can upload either spherical or non-spherical (cylindrical) panoramas.
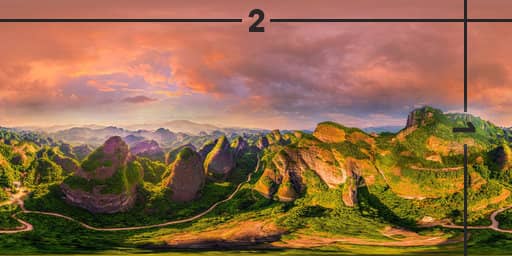
Spherical Panorama

A spherical image has an aspect ratio of 2:1, therefore the field of view is 360º. You can pan around the image 360º and also fully enjoy the nadir (bottom) and the zenith (top).
Cylindrical Panorama

A cylindrical panorama has an aspect ratio of 2:<1. You can pan 360º around horizontally but the nadir (bottom) and zenith (top) are not included in the panorama.
Create your own panoramas
There are different ways to create panoramas, find more info on these resources below:
- Getting started in 360º Panoramic Photography 360Cities Help Article.
- Create 360º panoramas using a smartphone or tablet with mobile apps such as Google Street View (here’s a helpful tutorial).
- Use 360º cameras: check 360 Rumors and Ben Claremont’s YouTube channel for interesting reviews and more info about 360º cameras.
Requirements for your panoramas
- Only JPG images will be accepted.
- 360 degree images, either spherical or cylindrical.
- File size 25MB maximum.
- No black and white images.
How to add panoramas to a Guided Tour
- Add a Panorama Slide to a Guided Your, then click on ‘Upload your own 360º panorama’.
- Select a panorama from your computer. Note: its extension has to be JPEG.
- Processing time depends on the size of the JPEG that has been uploaded but usually takes just a few minutes. While your panorama is processing, you can close the processing window and keep working on your Guided Tour. If your 360° panorama meets our technical requirements, it will be added to your Guided Tour.
- Add text, image, video, Google Forms tags to your Panorama Slide.